Utility Room Storage: Sharing Space With Cleaning Gear
How to share one room between laundry, cleaning tools, household back-stock and shoes: a zone for each function, the right storage for each, and clear access to the machines and equipment.
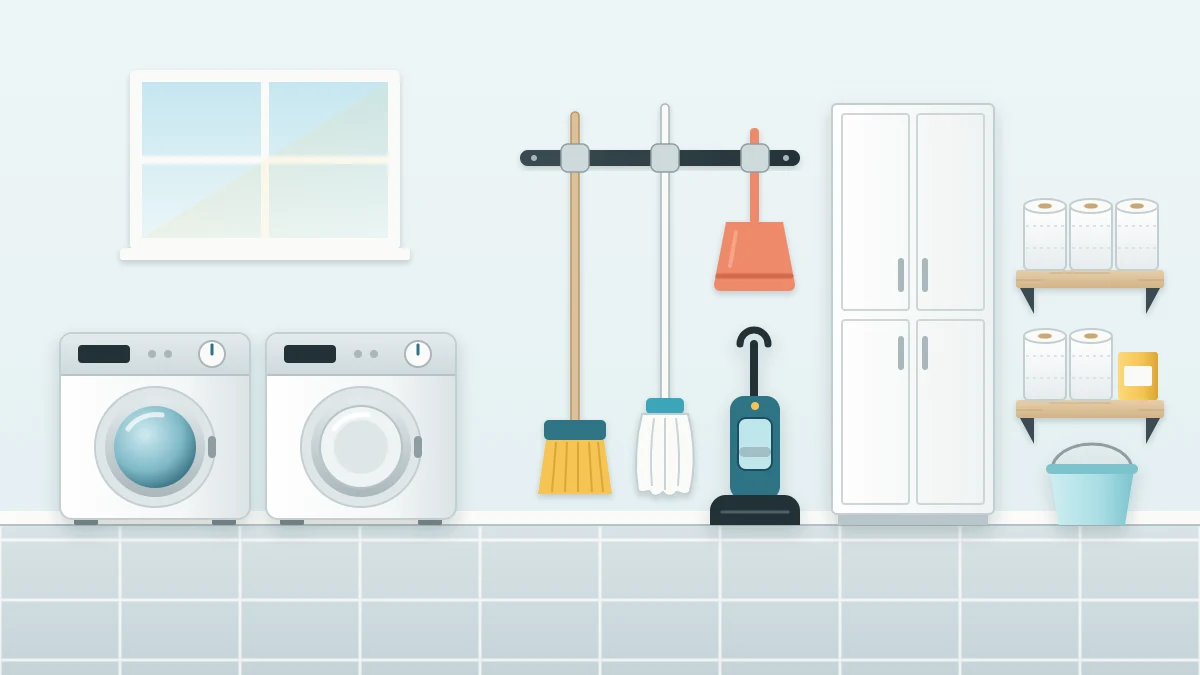
When the laundry area is also where the vacuum lives, the paper towels pile up and the dog’s leash hangs, good utility room storage is less about clever organizers and more about boundaries. Each job the room does needs its own territory. Without one, everything drifts toward the nearest flat surface, which is usually the top of the washer.
The approach here divides one shared room into zones by function, then picks a plain, sturdy kind of storage for each. It suits a true utility room, a mudroom with machines in it, or a laundry room that has quietly turned into the cleaning closet.
List the jobs the room really does
Start on paper. Write down every function the room serves today, not the ones you wish it served. A typical list looks like this:
- Laundry: washing, drying, sorting and folding.
- Cleaning tools: broom, mop, dustpan, vacuum, bucket, cloths.
- Cleaning and laundry products: everything that comes with a manufacturer’s label and directions.
- Household back-stock: paper towels, toilet paper, trash bags, bulk buys.
- Sometimes more: pet supplies, coats, shoes, sports bags.
Then decide which of those jobs stay. A shared room fills up fast, and some things simply live better elsewhere. The guide to what belongs in a laundry room and what does not helps with the borderline items before you plan a single shelf.
Give each function its own wall or zone
The simplest layout rule is one function per wall. The machines and everything used with them take one side. Cleaning tools take another. Back-stock goes on shelving at the far end, and coats and shoes stay near the door they come through.
In a narrow room with only one usable wall, divide by stretch instead: laundry beside the machines, tools in the middle, household stock at the end. What matters is that the zones do not overlap. A mop leaning in the laundry zone or a detergent bottle on the shoe bench is the first sign that a zone has no clear edge.
Storage that fits each function
Brooms, mops and dustpans
Long-handled tools belong on the wall, not in a corner where they slide and fall. A clip rail grips each handle so the heads hang off the floor, and a dustpan hooks beside the brush it works with. For rails, hooks and other options, see the ideas for using laundry room walls for storage. Follow the rail’s fixing instructions for your wall type, and check for pipes and cables before drilling, because utility walls often carry both.
The vacuum
Give the vacuum a marked parking space on the floor of the tool zone, or hang it on the wall mount supplied with it, fitted as its instructions describe. Attachments go in one open bin right beside it, so nobody hunts for the crevice tool.
Everyday cleaning caddy
A handled caddy carries the few cleaning products you use around the house each week, in their original containers, plus cloths and gloves. It travels to the bathroom or kitchen and returns to the same shelf. If children or pets use the room, that shelf is up high or inside the closed cabinet.
Cleaning and laundry products
Everything chemical goes in one high or locked cabinet, out of reach and out of sight. Products stay in their original containers, with caps closed, and are stored the way each label says. Where a label tells you to keep a product away from others, give it a separate shelf, and never mix products. A latch is a help, not a substitute for putting things away right after use.
Paper goods and bulk buys
Bulky, light items suit deep open shelves or a freestanding unit at the back of the room. If you are choosing one, the guide to freestanding laundry shelving units covers sizes and placement. Secure any tall unit against tipping with the restraint supplied or an anti-tip kit, following its instructions, and keep heavy things on the lowest shelves.
Shoes, coats and pet gear
A low bench or a boot tray by the door catches shoes before they reach the laundry zone. A short row of hooks above it takes coats and leashes. Keep this zone on the far side of the room from the machines, so wet boots and laundry baskets never compete for the same floor.
Where each thing goes at a glance
| Item | Best storage | Where |
|---|---|---|
| Broom, mop, dustpan | Clip rail or sturdy hooks | Tool wall, heads off the floor |
| Vacuum and attachments | Floor parking space or supplied mount, one bin for parts | Tool zone, clear of walkways |
| Everyday cleaning supplies | Handled caddy holding original containers | High shelf or closed cabinet |
| Laundry and cleaning products | High or locked cabinet | Above or beside the laundry zone |
| Paper goods, bulk buys | Deep shelves or freestanding unit | Back wall or far end |
| Shoes, coats, leashes | Bench, boot tray, hooks | By the door, away from the machines |
Keep the working parts of the room clear
A utility room often holds more than a washer and dryer. Whatever else you store, keep an open route to the machines, the water shut-off valves, the electrical panel and any water heater or furnace. You should be able to reach each of them without moving a bin first.
Store nothing against or on top of heating equipment, and follow that equipment’s own instructions for the space around it. The same goes for the washer and dryer: keep clear whatever space, door swing and vent path the appliance manual asks for, and let no shelf, bag or tool press on hoses or connections.
Good to know
If you are not sure how much room a water heater, furnace or panel has to have around it, do not estimate. Check the instructions for that equipment or ask a qualified professional before placing storage nearby.
Let damp tools dry
A wet mop pushed into a closed cabinet stays wet. Hang mops head-down on the rail with air around them, drape cloths over a bar or a small rack, and stand the empty bucket upside down until it is dry. Keep damp things away from paper goods and cardboard boxes, which soak up moisture quickly.
A two-minute reset that protects the zones
Shared rooms go wrong slowly. One item lands in the wrong zone, then a second joins it. A short reset at the end of laundry day stops that:
- Return tools to the rail and the caddy to its shelf.
- Put every product back in the cabinet and close the door.
- Clear the machine tops and the bench.
- Carry out anything that belongs in another room.
Frequently asked questions
How do I organize a laundry room that is also a utility room?
List every job the room does, then give each one its own wall or stretch of wall: laundry by the machines, cleaning tools on a rail, household stock on shelves and shoes by the door. Keep each zone to its own things and reset the room at the end of laundry day.
Where should cleaning products go in a utility room?
Keep all cleaning and laundry products together in one high or locked cabinet, out of reach and out of sight of children and pets. Leave them in their original containers with caps closed, store them the way each label says, and put them back right after use.
Can I store things next to the water heater or furnace?
Store nothing against or on top of heating equipment, and follow that equipment's own instructions for the space around it. Keep an open route to the water heater, furnace, electrical panel and water shut-off valves. If you are unsure how much room to leave, ask a qualified professional.